Quick Start
This guide will help you get started with creating projects, adding test cases, and running tests.
Creating a Project
A project in QA Sphere can be used for assigning test cases to a specific app or a certain functional part of a bigger application.
- Navigate to the top-right corner of the screen.
- Click on the Add Project button.
- Follow the prompts to set up your new project.

Adding Test Cases
Well-described and structured test cases are the basic requirement for running tests.
- Switch to the Test Cases tab in your project.

- Add test cases using one of two methods:
- Type directly into the list
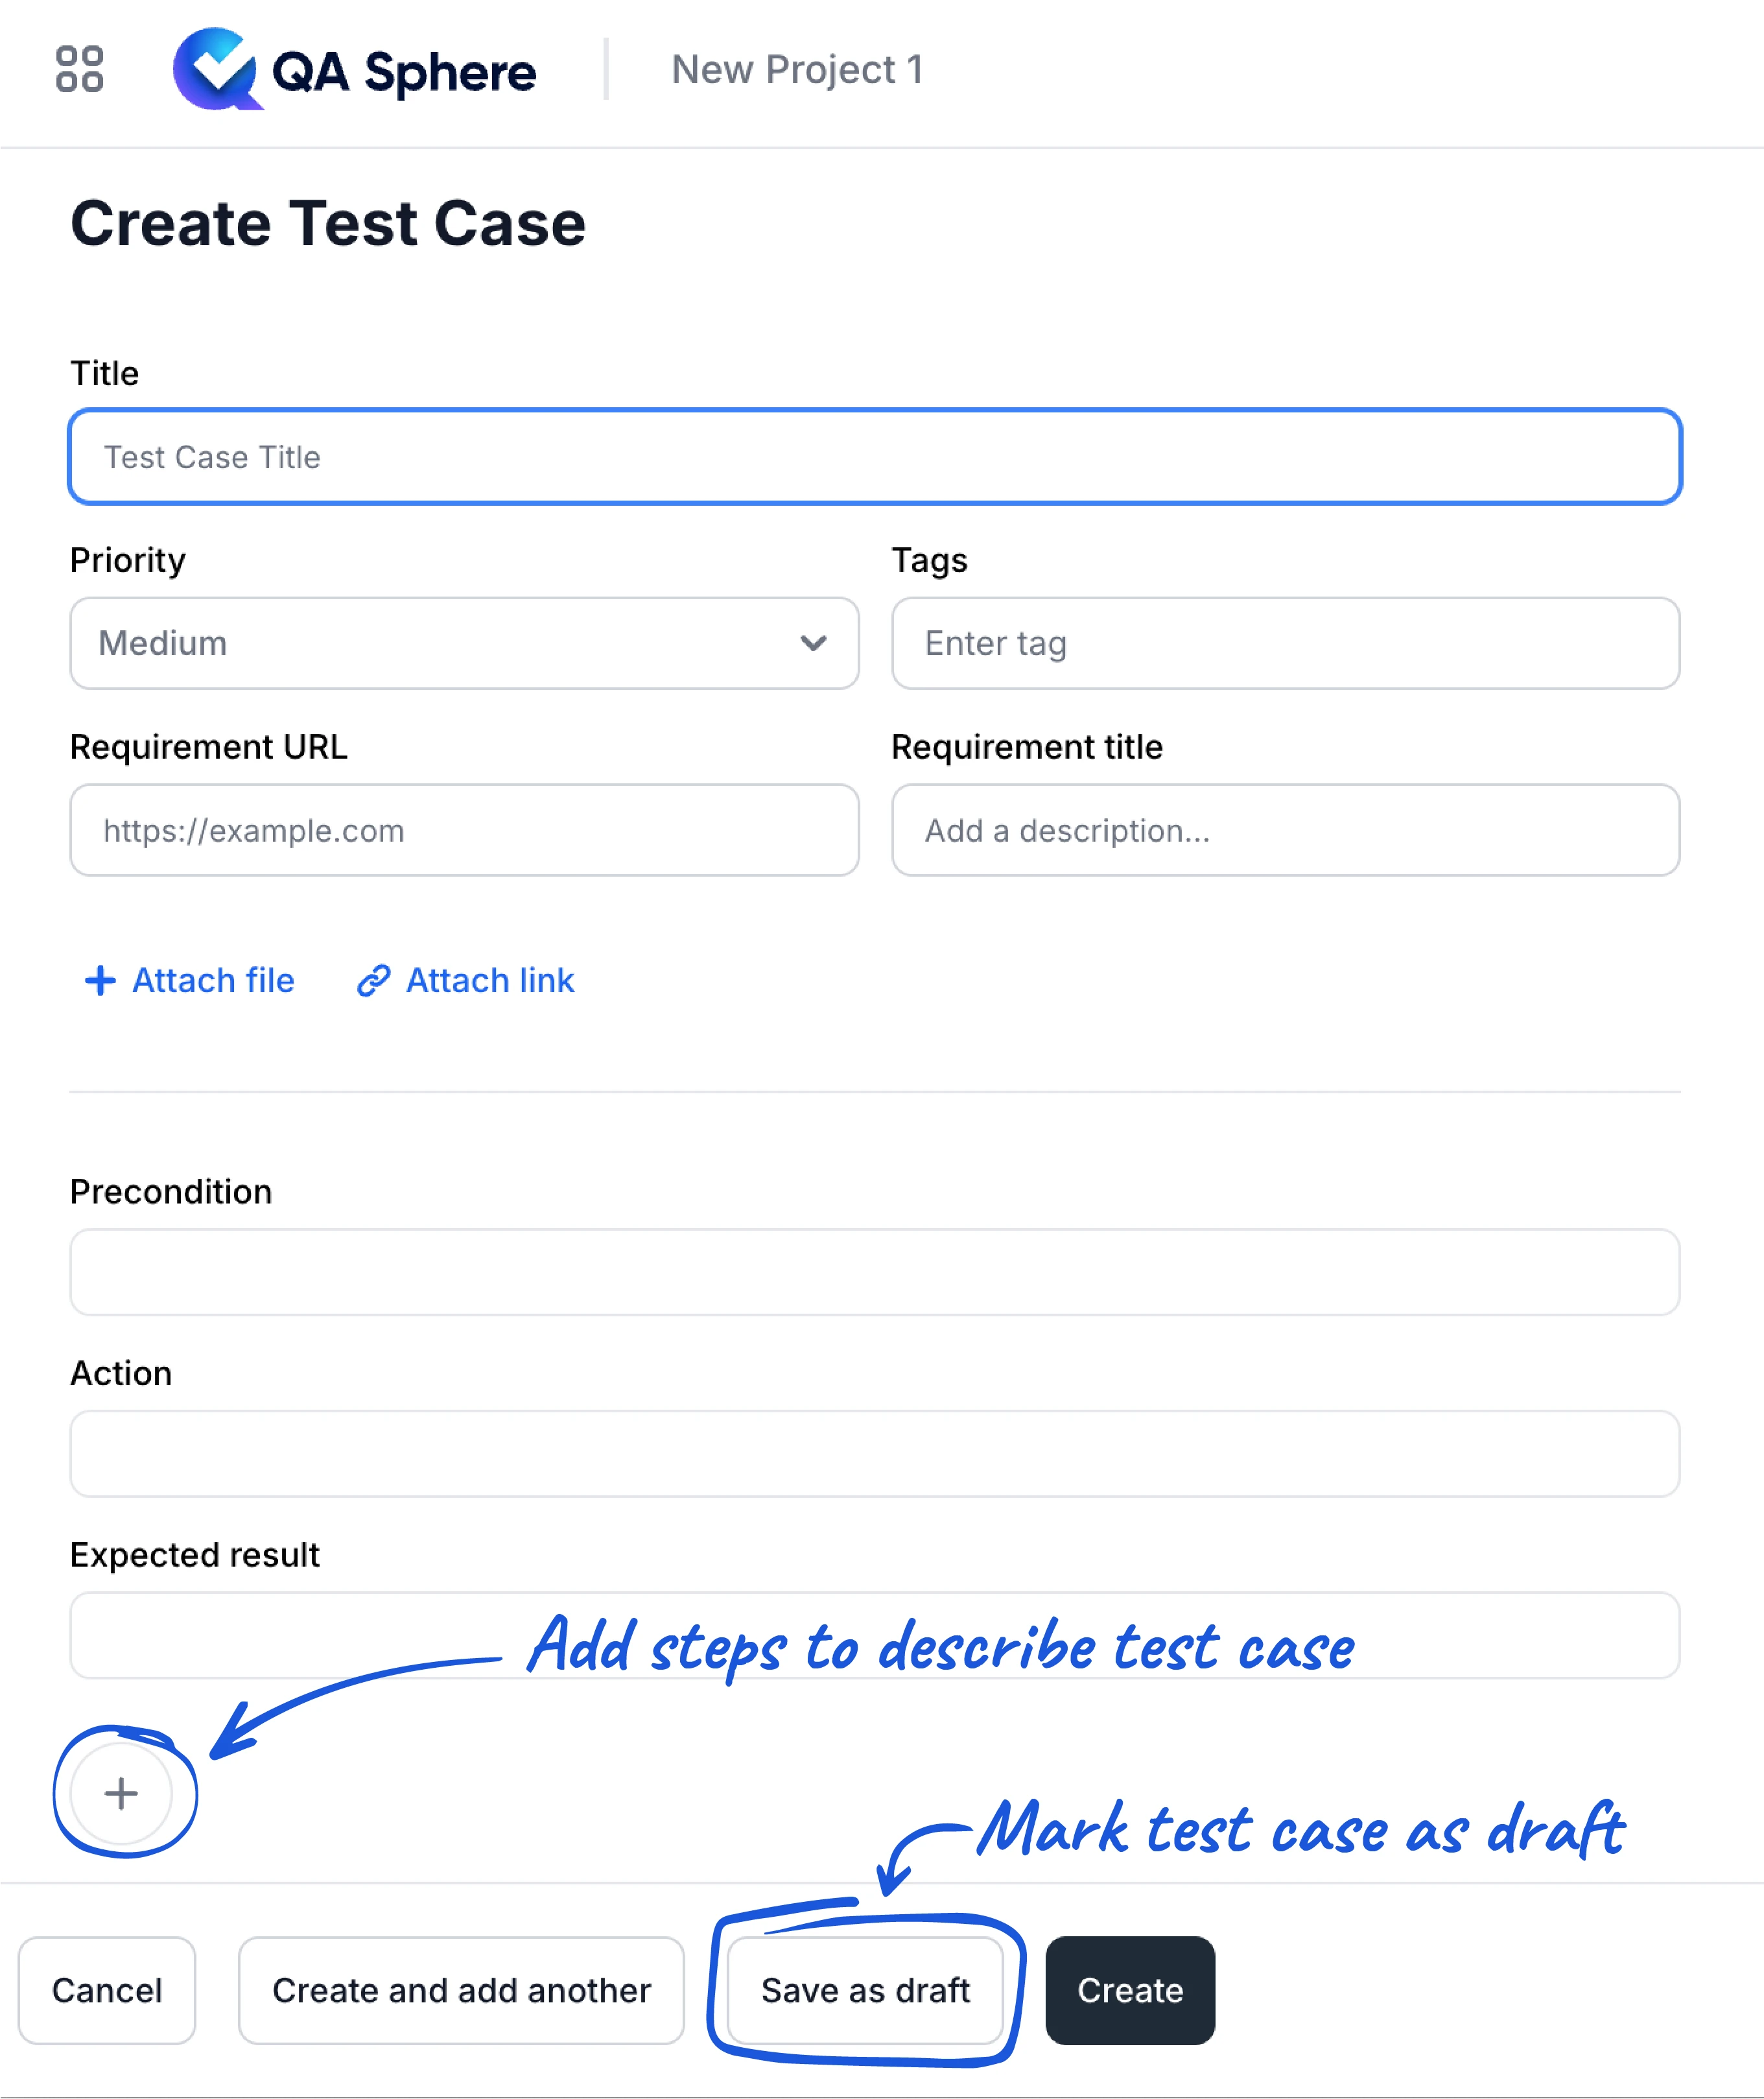
- Use the Create Test Case form for more detailed entries

- Create folders using Create Folder button and organize your test cases for better structure
Using the Create Test Case Form
The form allows you to specify:
- Detailed description
- Preconditions
- Steps to take
- Requirements
- Priority
- Tags
- Additional resources (attachments)
Creating Test Runs
-
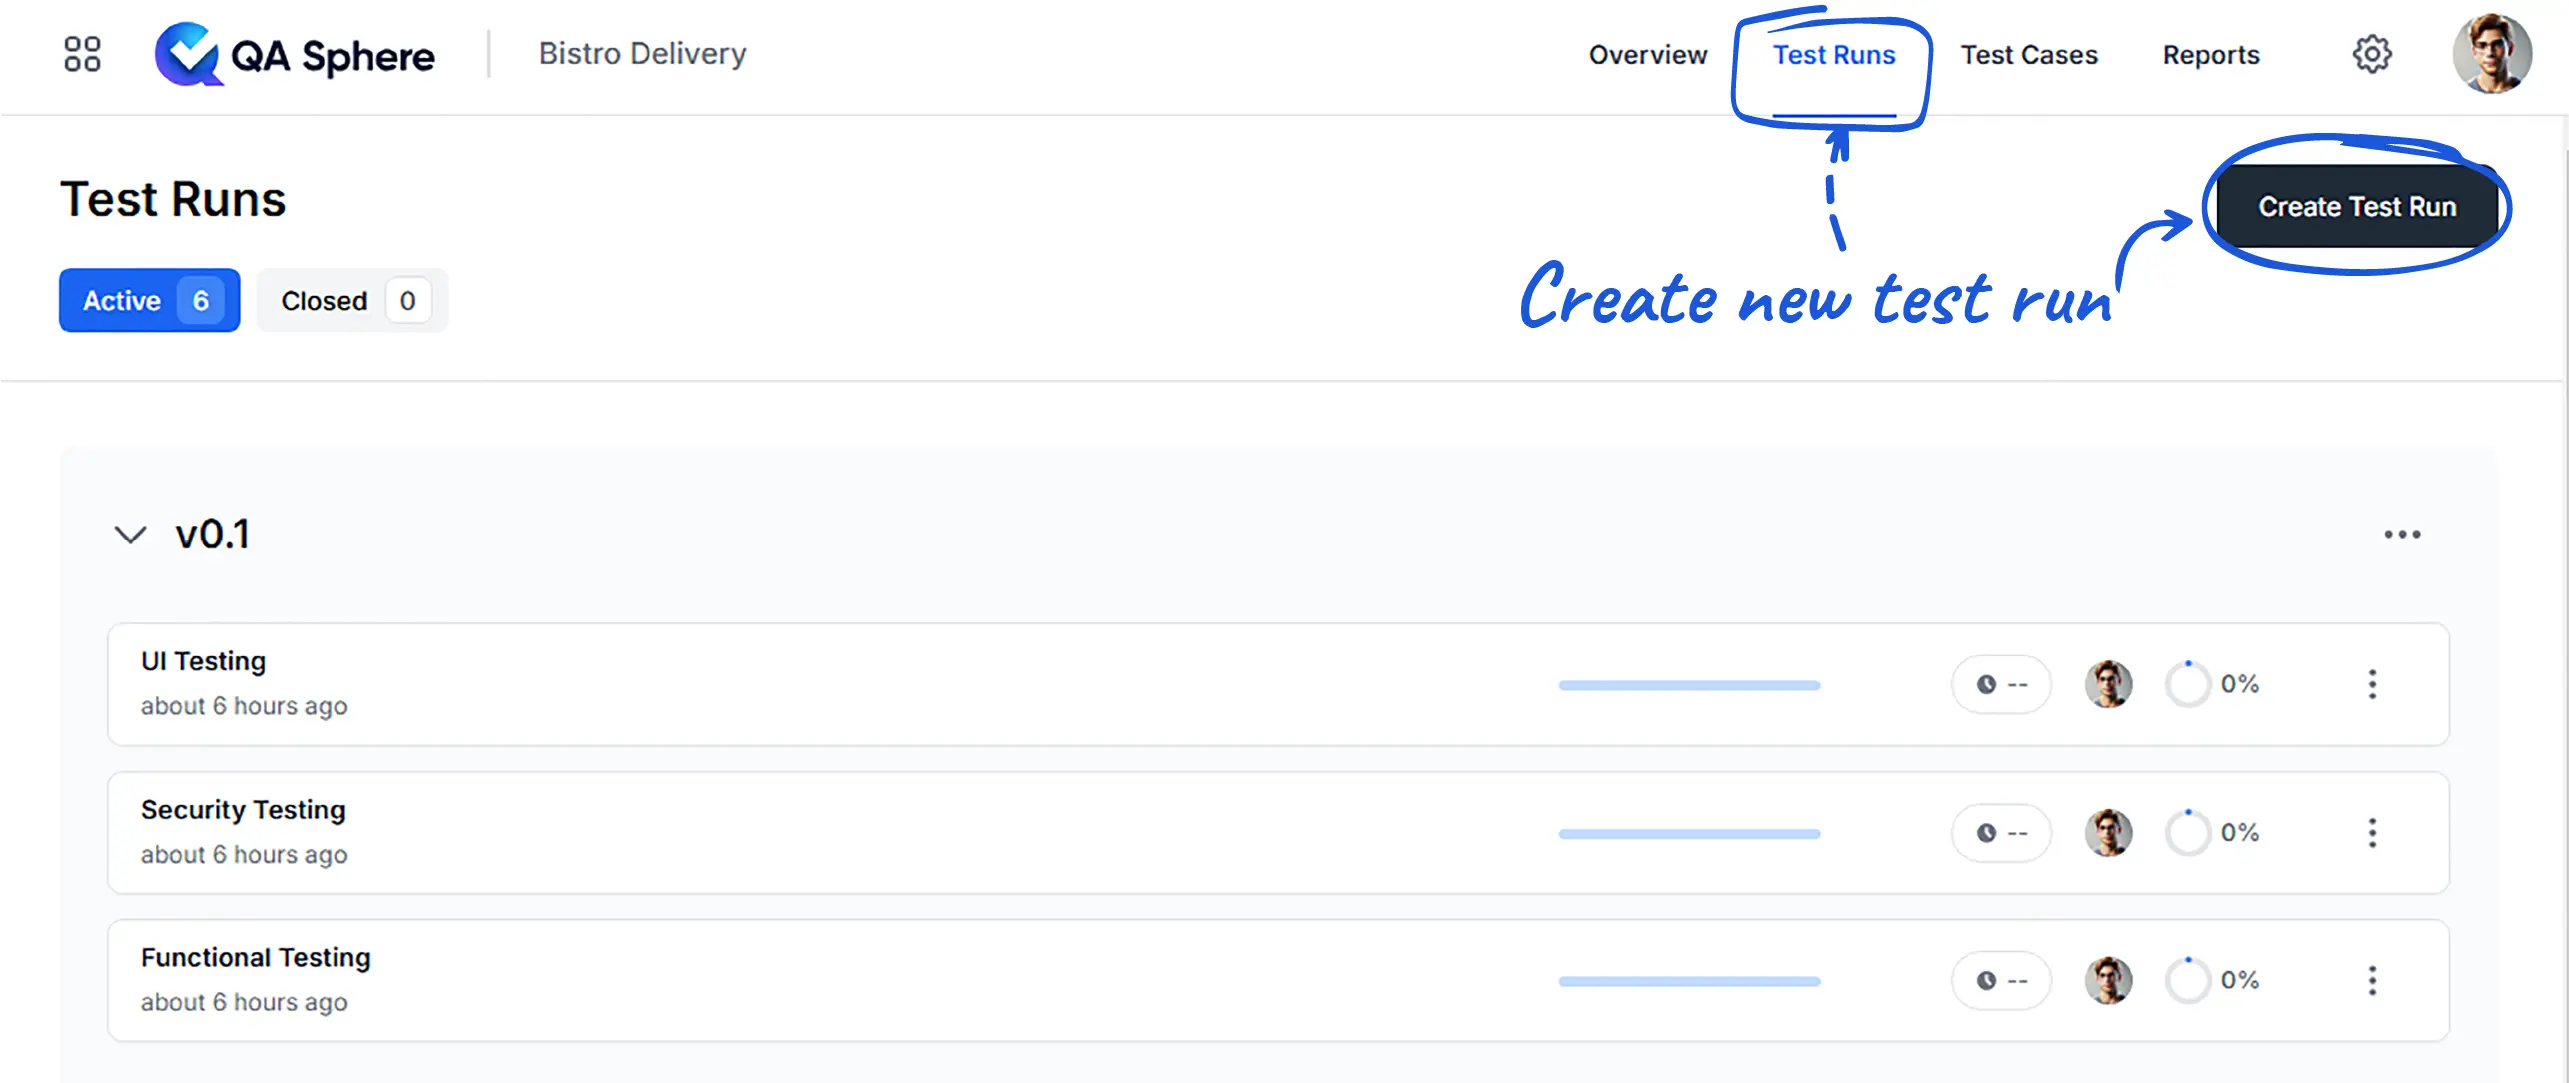
Navigate to the Test Runs section and click Create Test Run.
-
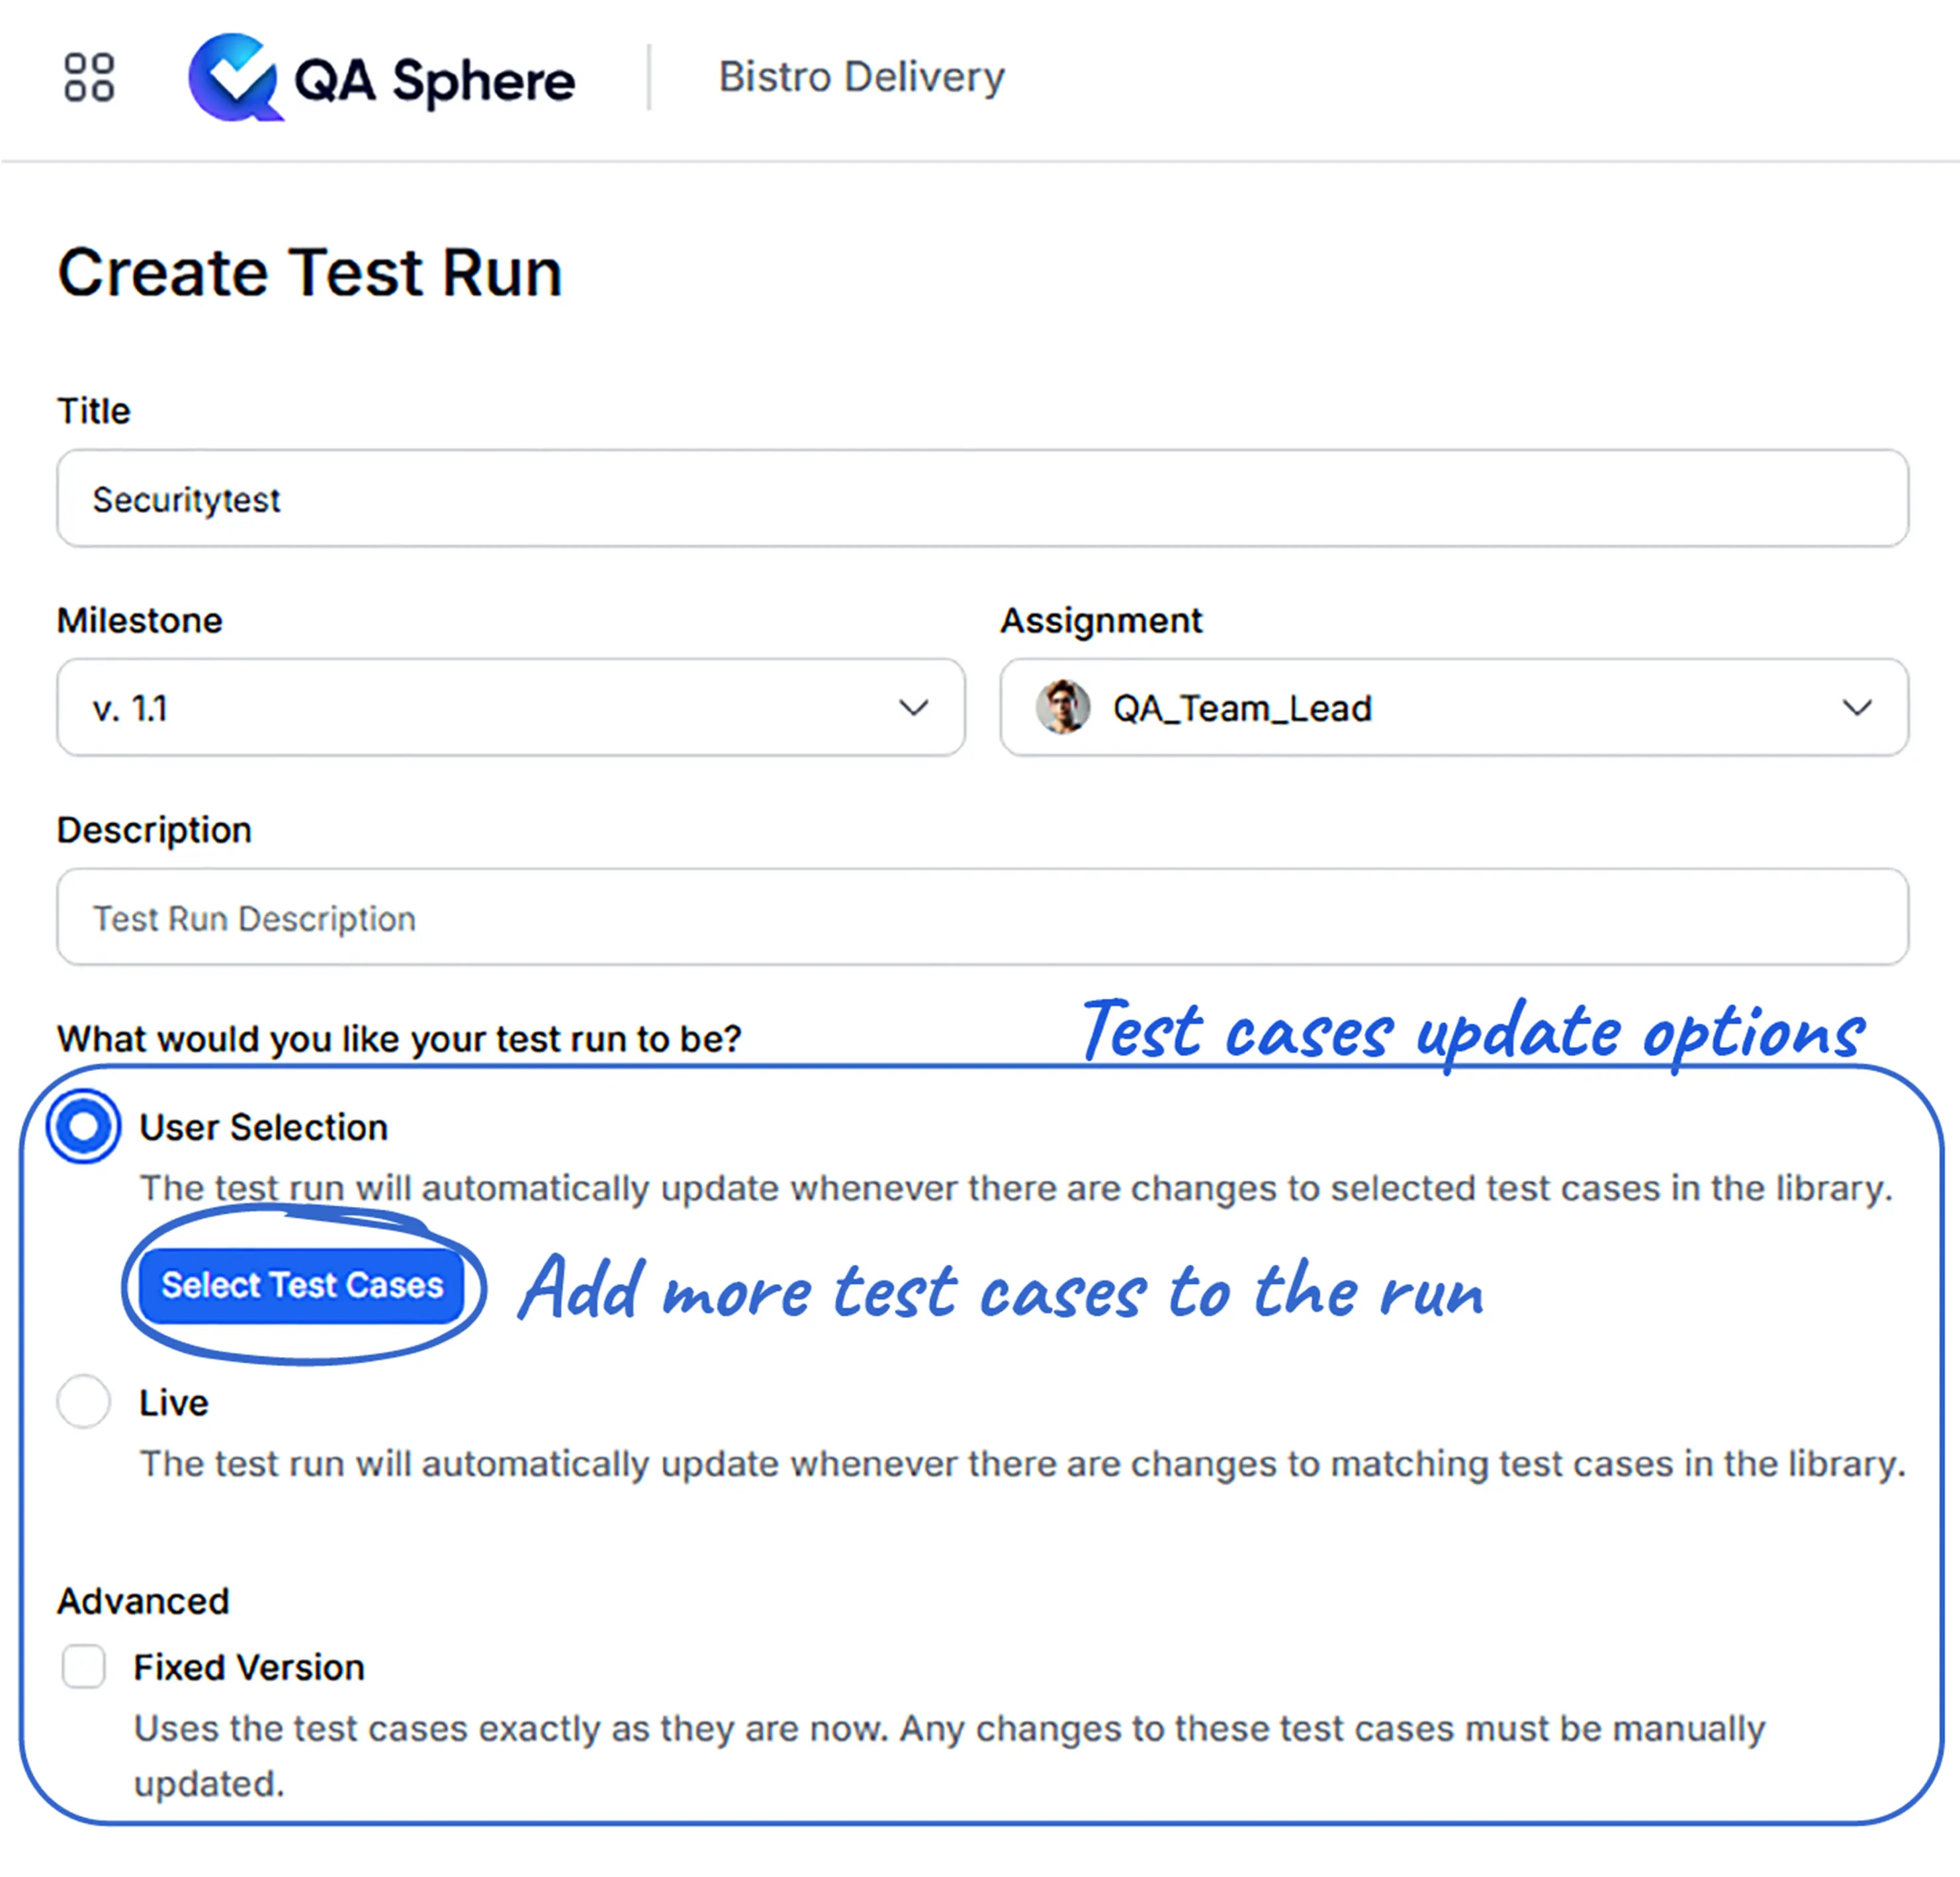
Name and describe the test run, assign a team member, and select a milestone.
-
Select the test cases update option:
- Choose User Selection to pick test cases individually.
- Live mode builds test runs based on the test case folder structure.
NOTE: In both modes, the test run will update when test cases are modified in the library.
- Select Fixed Version to preserve the current state of test cases regardless of future modifications in the library.
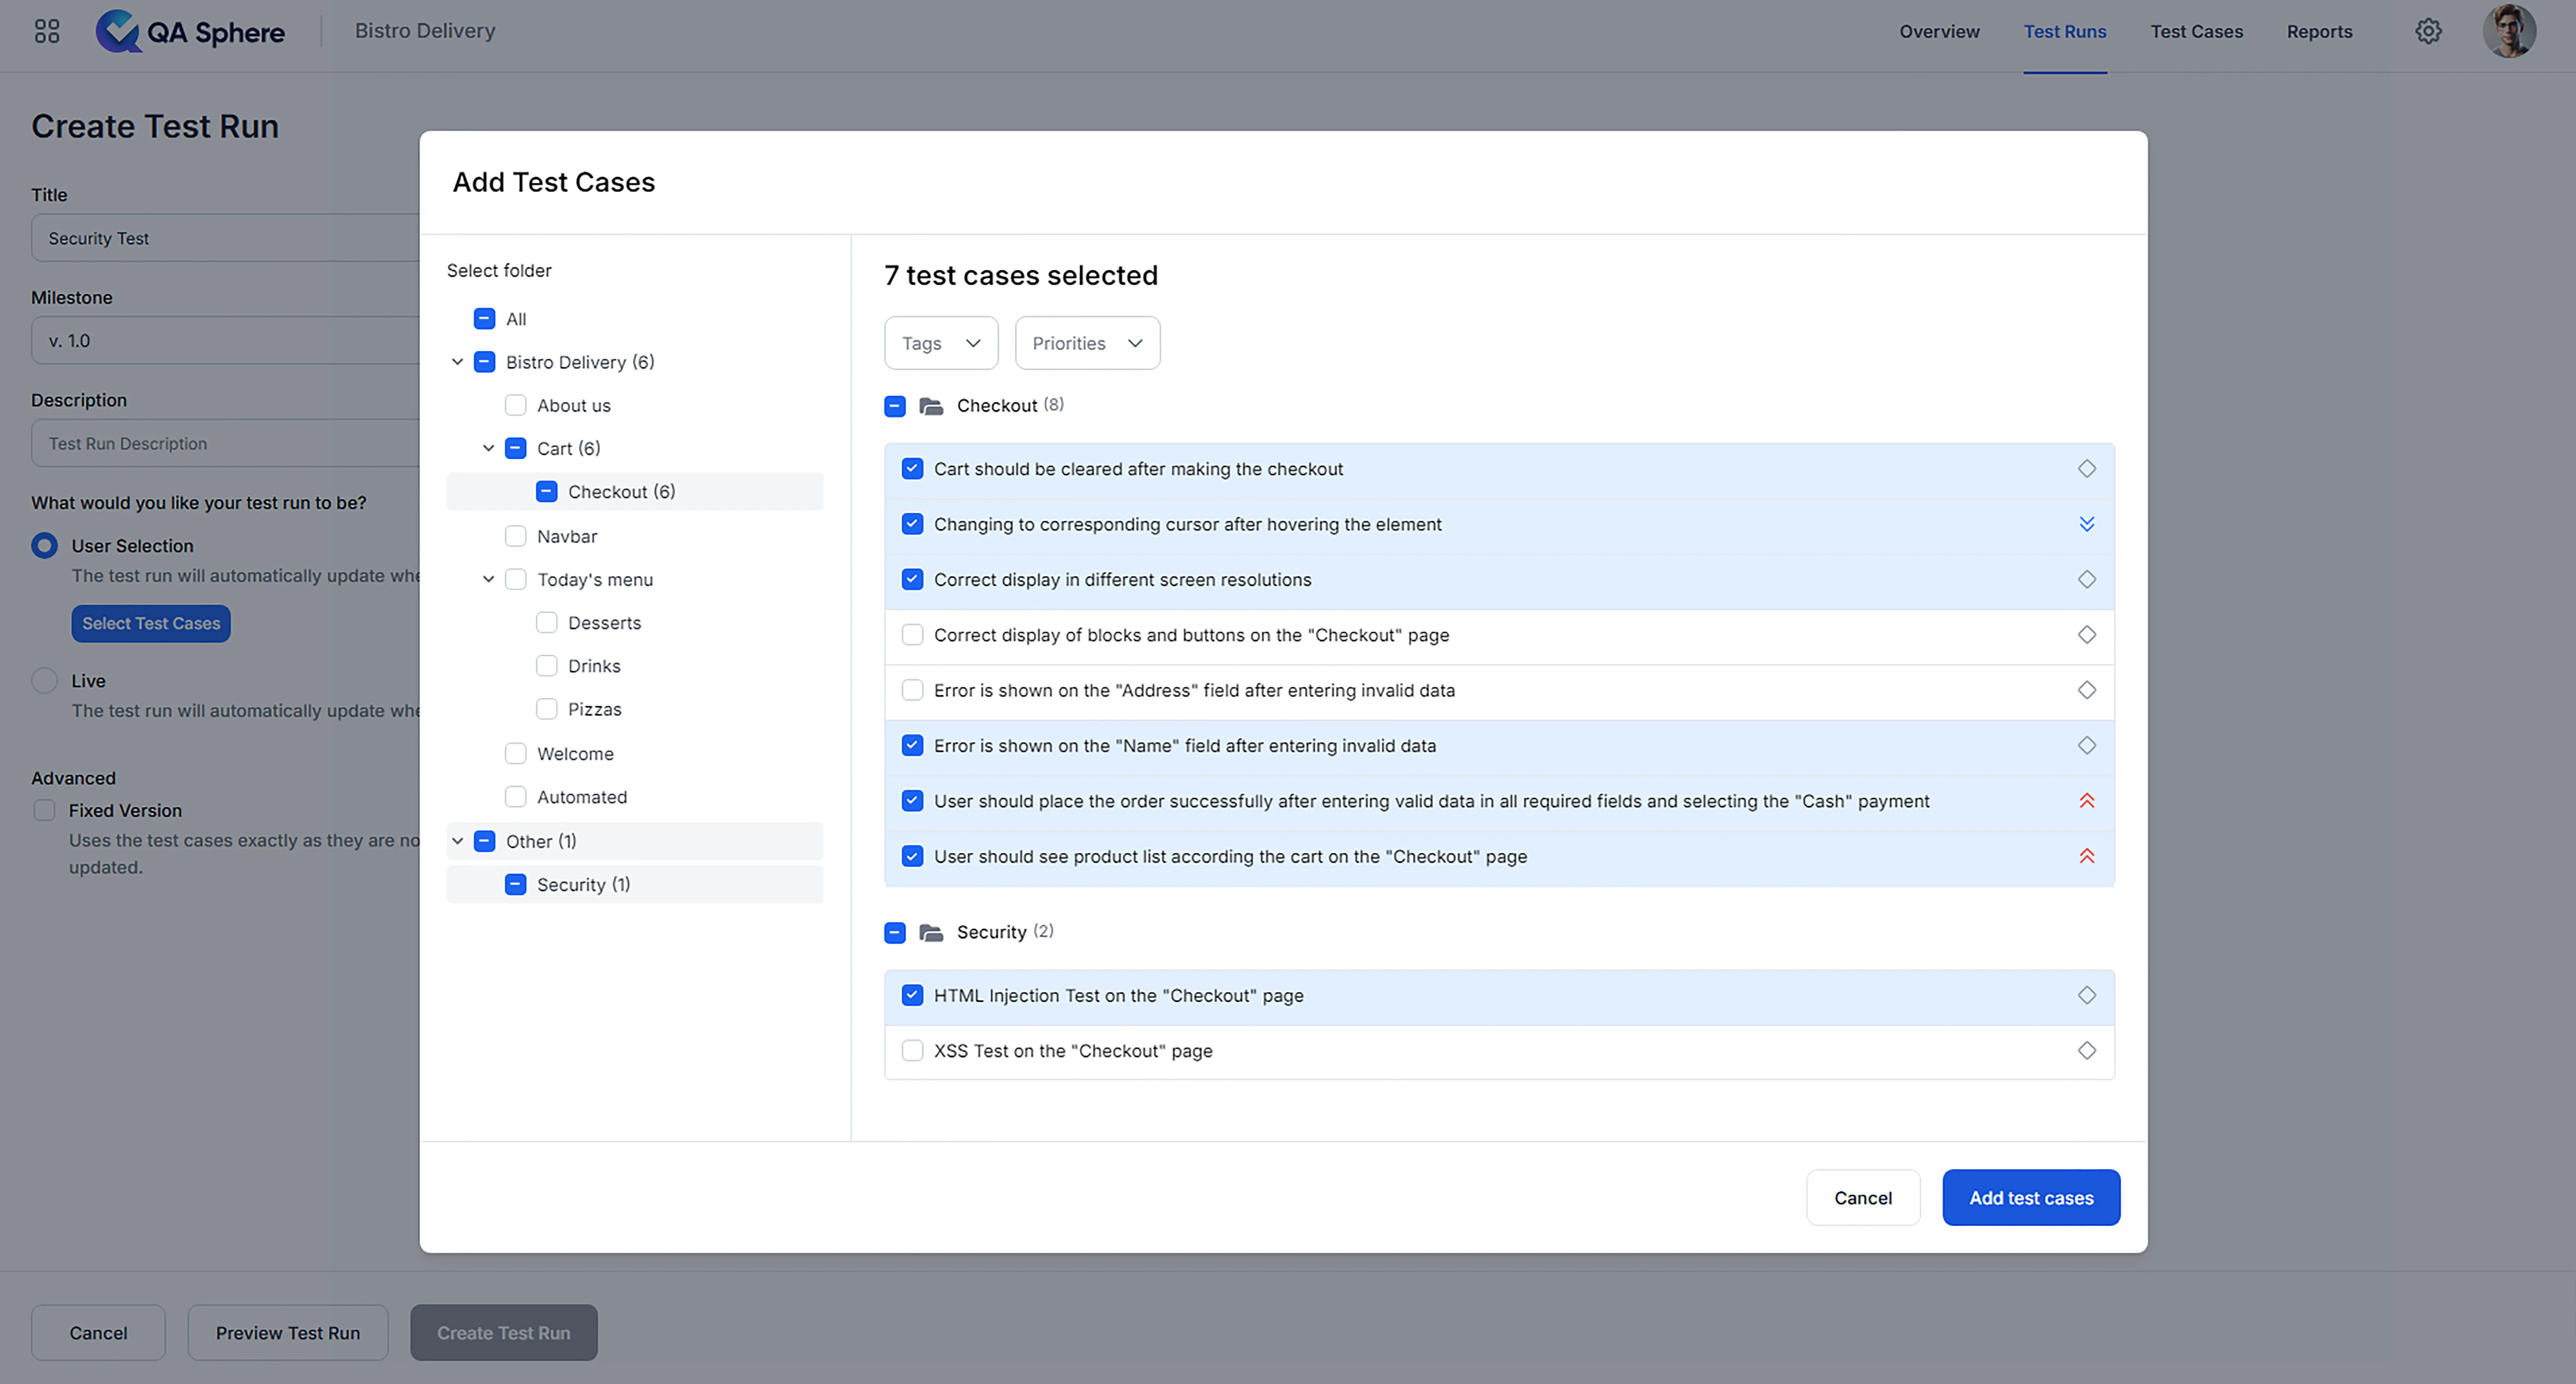
- Select test cases for the test run, review the preview if needed, and click Create Test Run to finalize.
Executing Test Runs
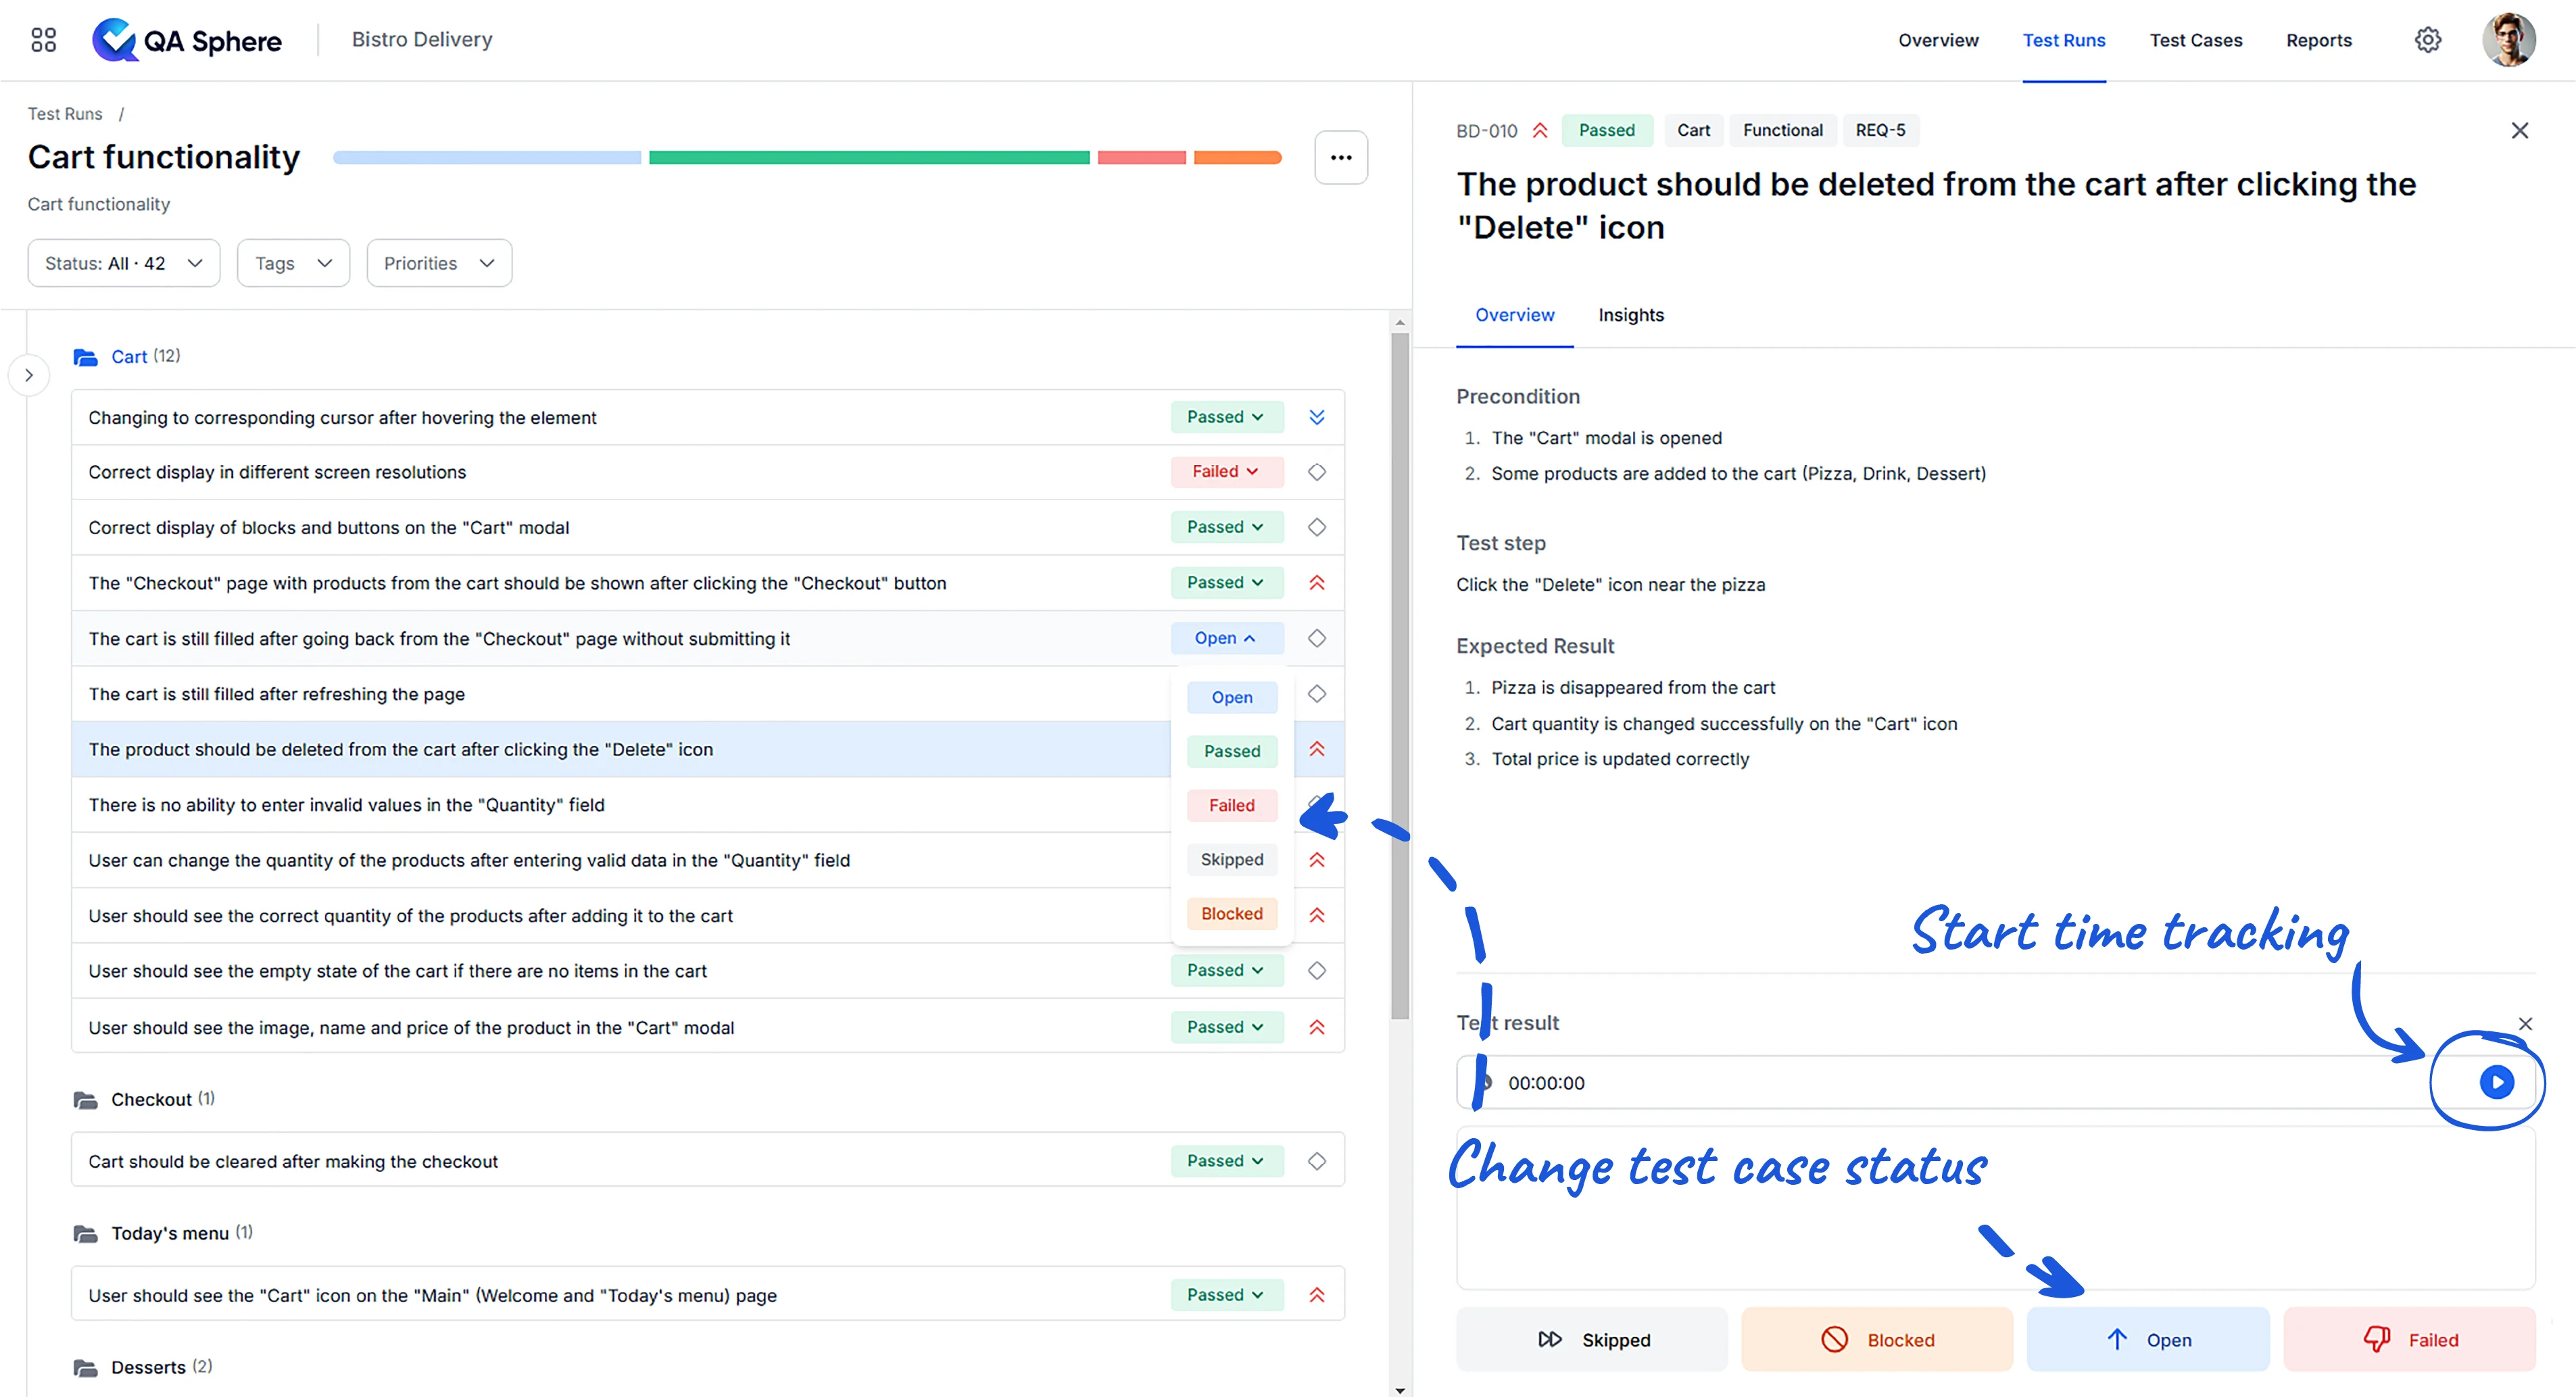
- Start the test run by clicking on it.
- Follow the instructions for each test case.
- Mark the status of each test case based on results.
- Track time spent on individual test cases.
Reviewing Results
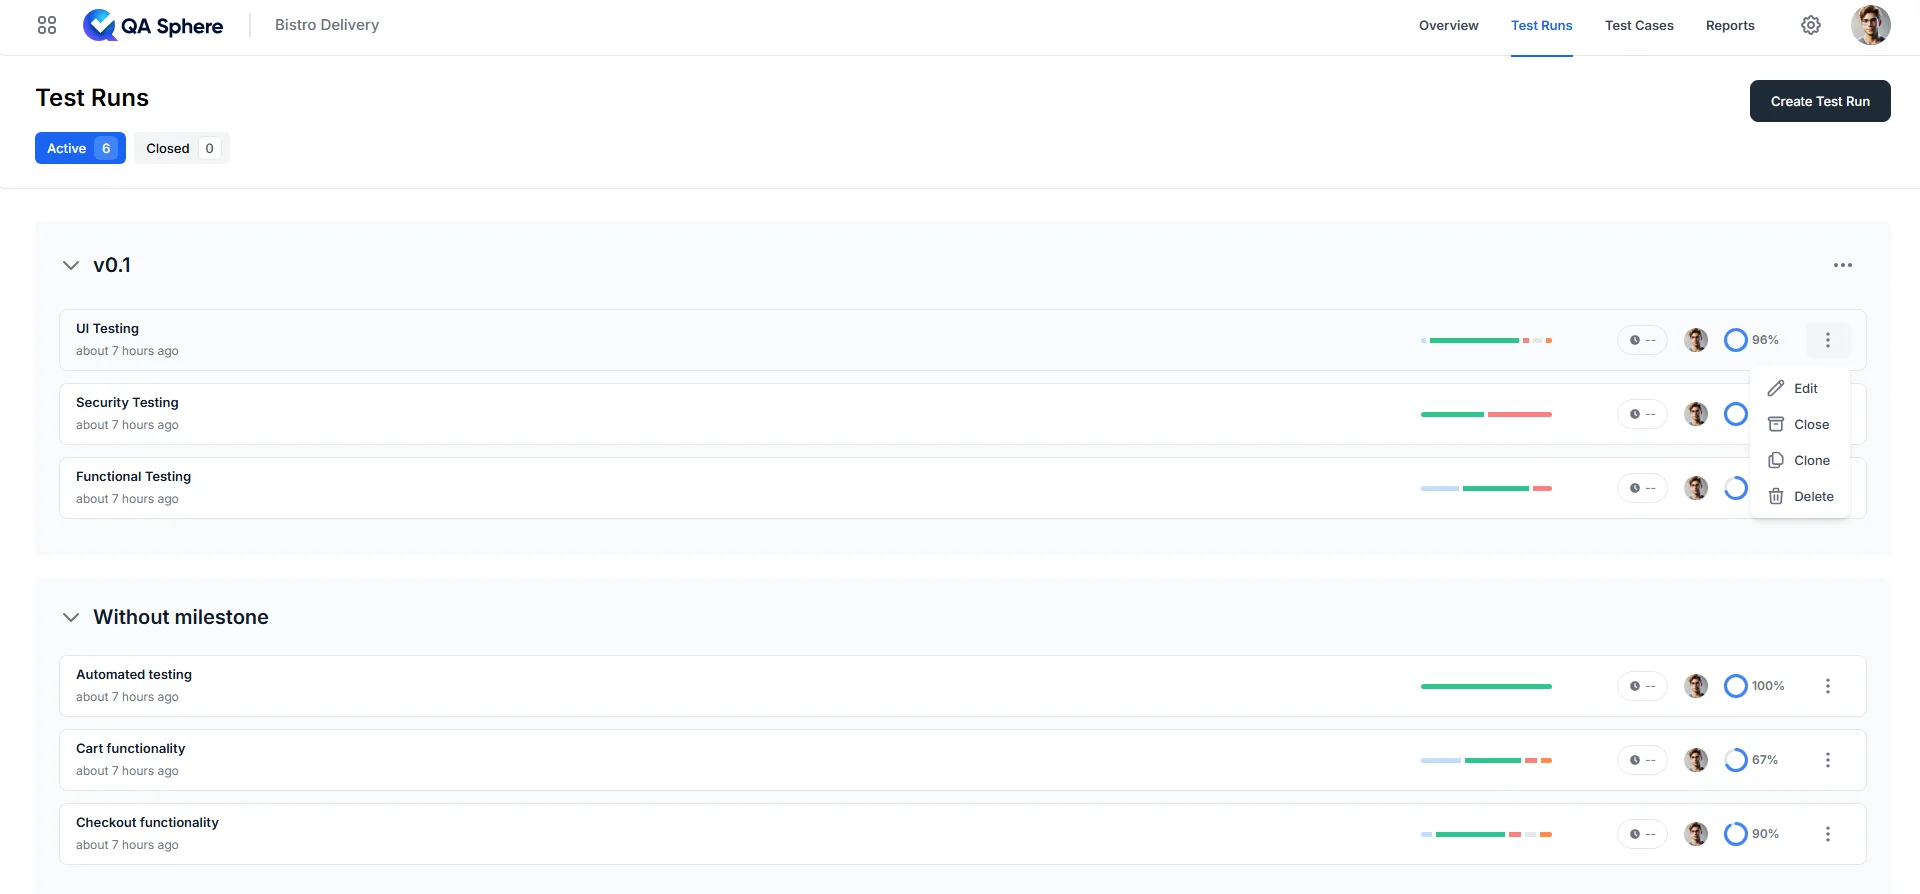
- Once the status of all test cases is updated, the test run can be closed.
- All test run details are automatically saved and can be reviewed later.
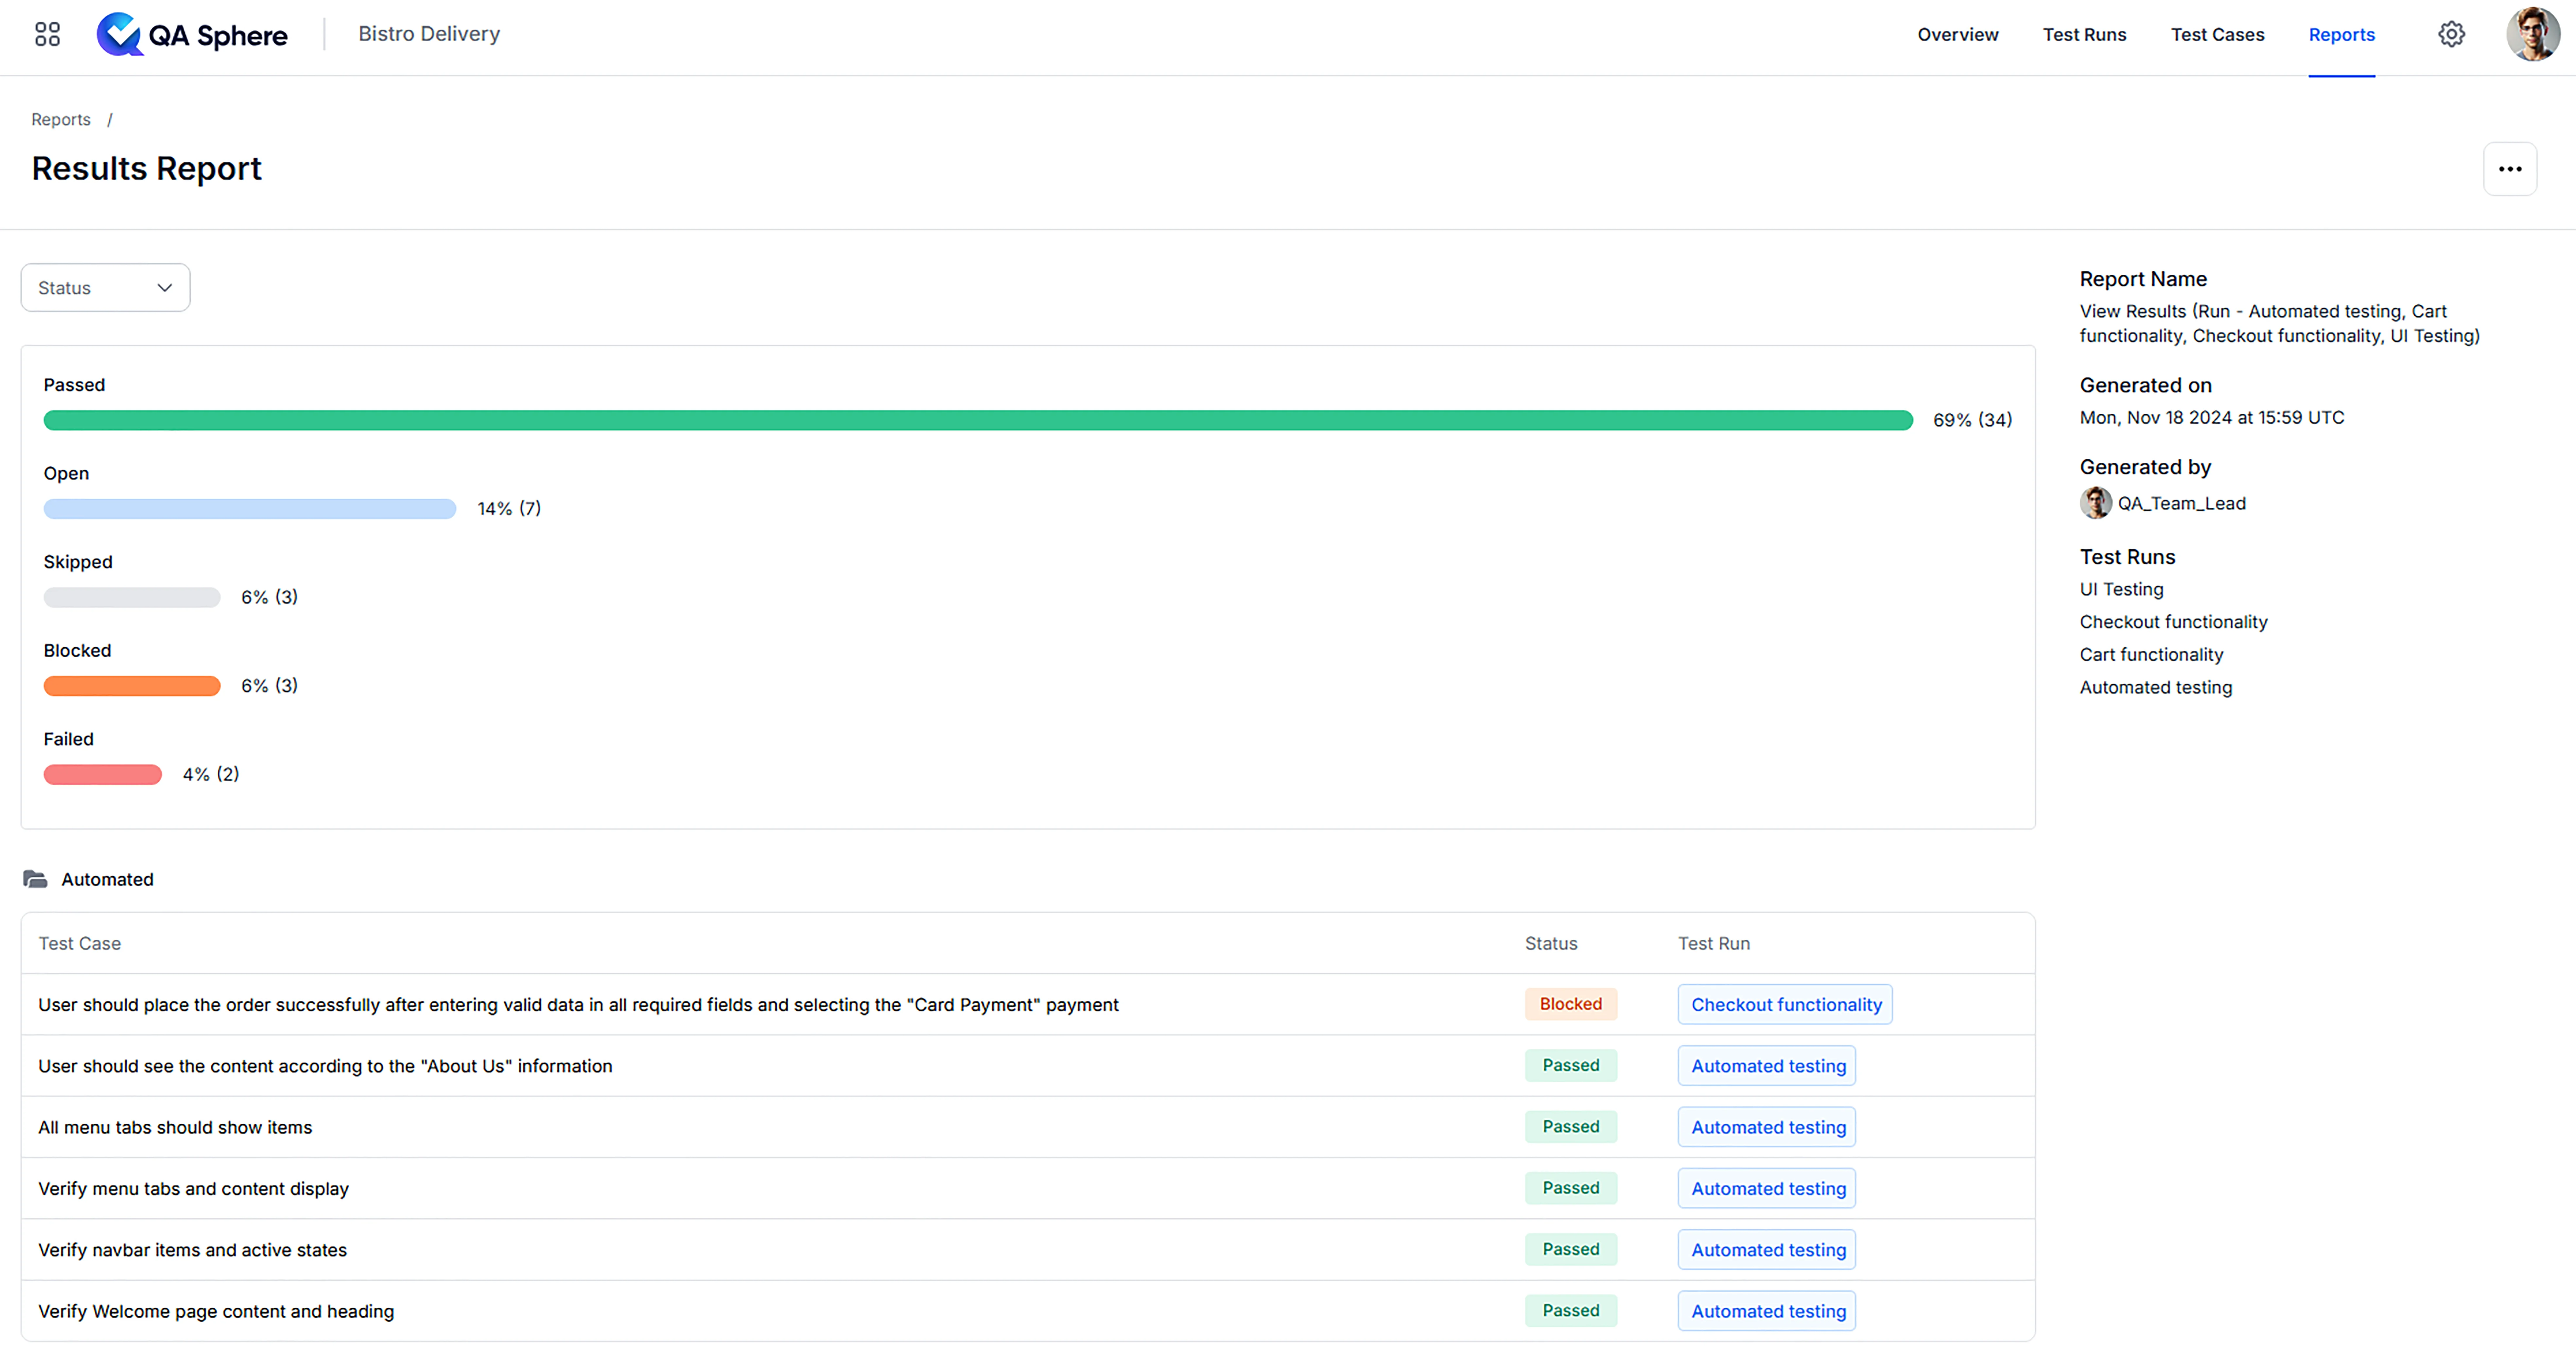
- Detailed reports can be generated out of the test runs' data.
By following these steps, you'll be well on your way to effectively using QA Sphere for testing your products.